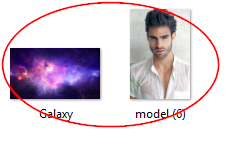
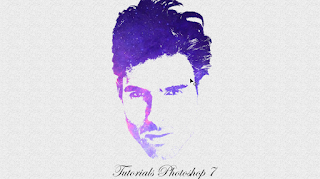
 The effect of this time is different from the previous effect, because you need the right material to make the effect, therefore you must have a galaxy image, you can download in Google or Google Image Downloader, after the material you have prepared can be instantly view. Tutorial. Below and you can also see the tutorial, before this in the home menu like Blue Eye Effect In Photoshop tutorial and much more.
Ok
just look under the simple tutorial we have created and if you are
confused you can comment in the comments field or you can contact on the
menu Contact Us good luck.
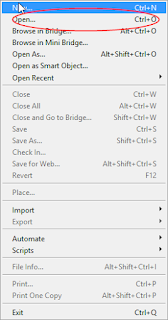
Open Image In Folder
We start taking the material first like the image that I have in screen, you can also use Ctrl+o on your keyboard.
 |
| Open Folder |
 |
| Select The Image |
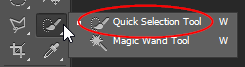
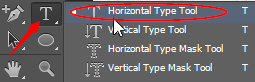
Choose Quick Selection Tool
You can select the Quick Selection Tool in the Toolbar menu or maybe you can choose Polygonal Lasso Tool, but if you want to choose your quick method just choose quick selection tool.
 |
| Choose Quick Selection Tool |
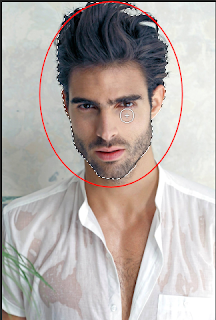
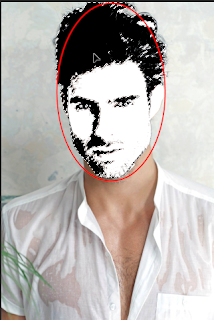
Drag the face of the model using the
Quick Selection Tool you have selected as shown below.
 |
| Drag The Face |
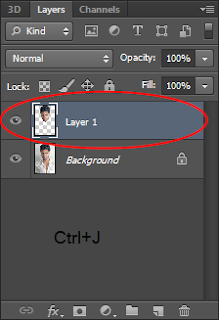
Type Keyboard Ctrl+J
After you finish dragging using the Quick Selection Tool, the next step you type in the keyboard that you use Ctrl+J so that on the layers menu automatically appears layer 1 this process can be called cutting object.
 |
| Results from Type Keyboard Ctrl + J |
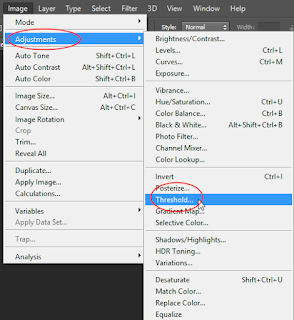
add threshold in menu photoshop
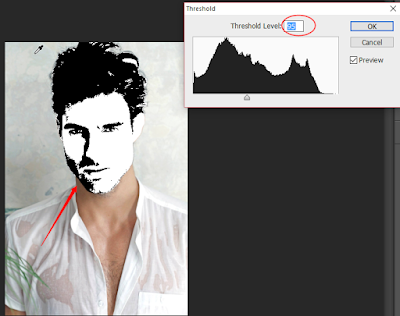
After you click Threshold in the Photoshop menu now you set the threshold level, adjust the model you use like the example image below then click ok.
 |
| Click Threshold |
 |
| Adjust Threshold Level With Your Model |
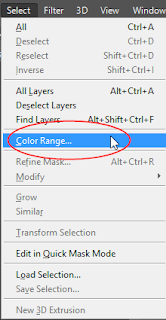
Select Color Range
Then after you set your selected Threshold now go to Photoshop menu next to menu Type there is menu Select roll down and select color range.
 |
Choose Color Range
|
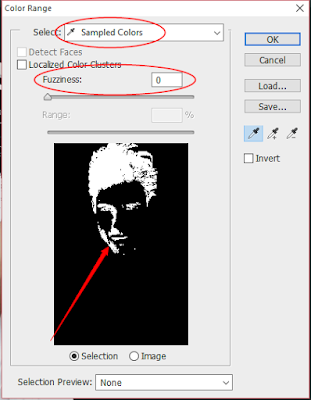 |
| Adjust Like This Picture |
Add New Document
We go to the new document now you type in the keyboard you are using Ctrl + N as shown below.
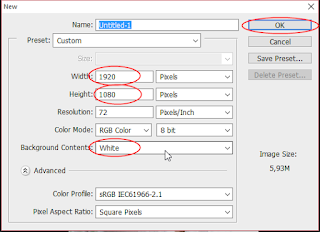 |
Click Ok
|
Create a new fill or adjustment layer and select this Pattern so that the background will match the effect we will create later.
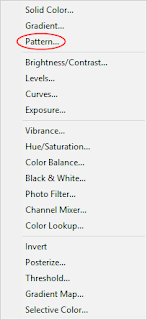 |
| Select Fill Pattern |
 |
| This is the result of the pattern |
Add Move Tool
After you create the document now you select Move Tool and drag the model face to your new document.
 |
Move Tool
|
 |
| Drag the face of this model to document |
 |
| Like This |
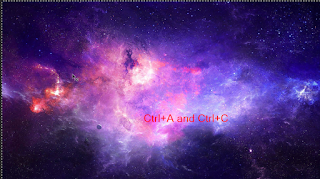
Copy Image Galaxy
Now it's time to copy the galaxy image and paste it in the document you just created like the example image below.
 |
| Copy this image to the document you have created |
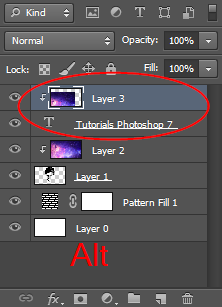
After that type Alt and left click on the mouse you use, and its result like the following example.
 |
| Put the layer 2 image into layer 1 using Alt click |
 |
| And this is the result |
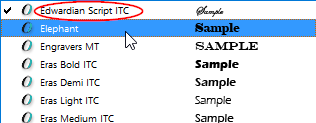
Next Step Add Text
Follow the steps like in the picture below, here I make a Tutorials Photosho 7 and you make your own writing, this is just an example only.
 |
| Add Text |
 |
| Text Type |
Adjust the text you have made to look neat is very influential on the final result.
 |
| This Is An Example |
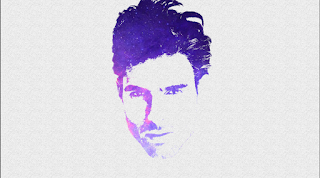
Back To The Galaxy Image
Copy the Galaxy Image like the step you have passed, because it will beautify the text, so that the final result looks perfect.
 |
| Alt Click |
 |
| After Alt Click |
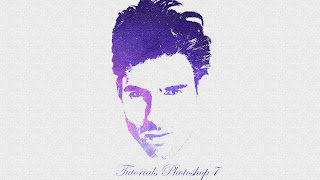 |
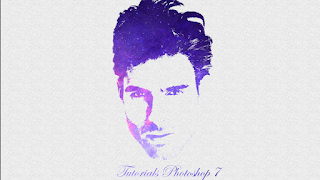
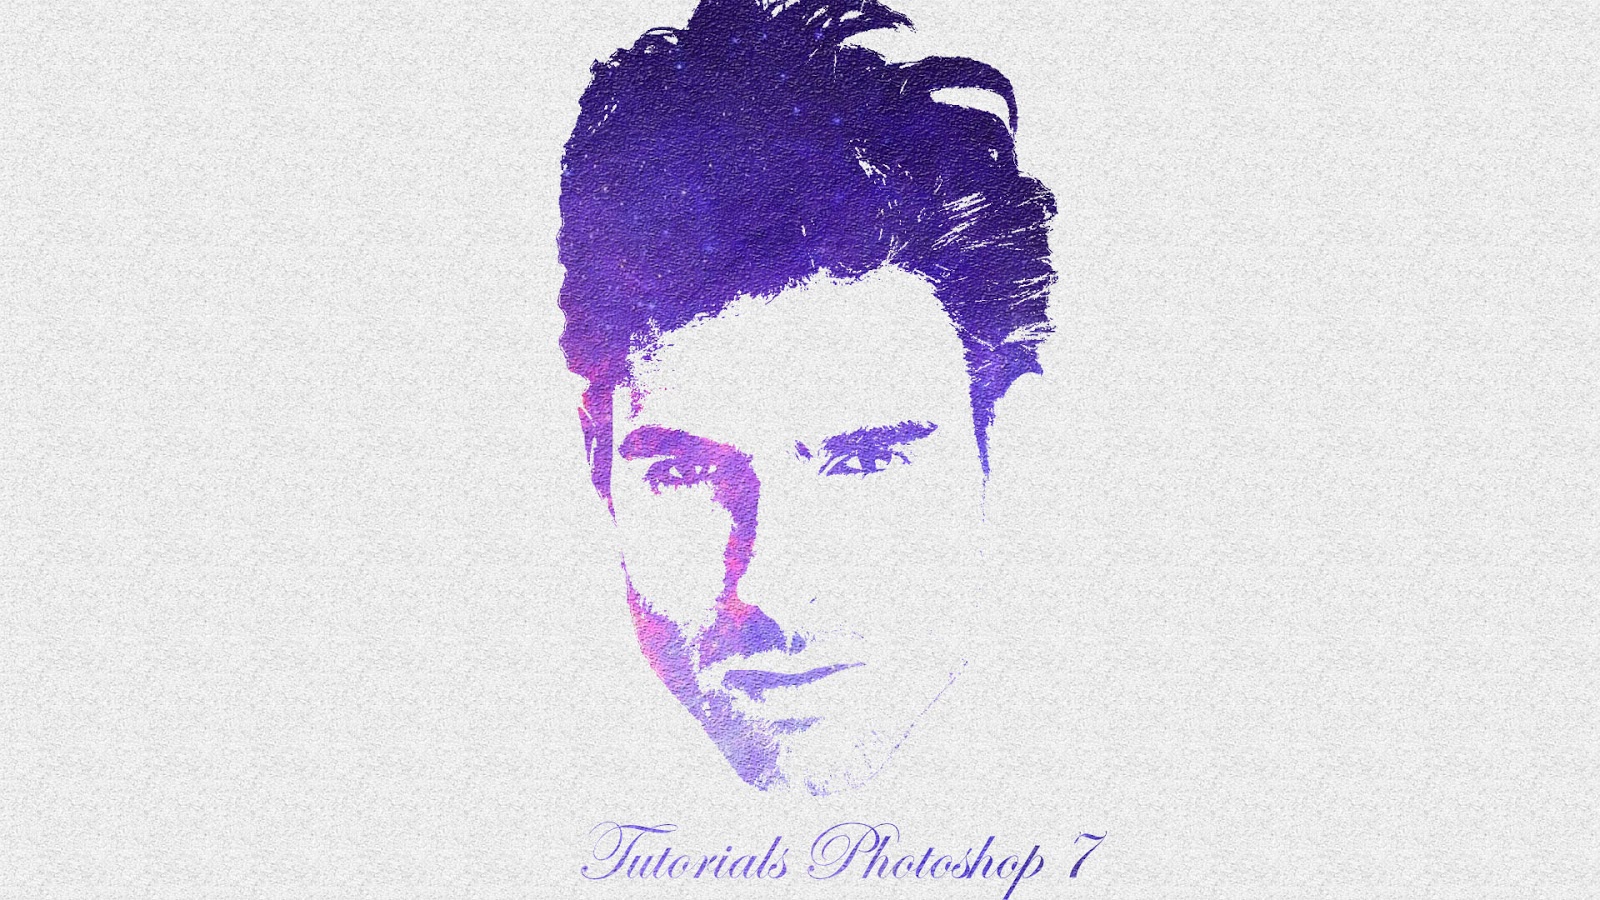
| The Final Result |
Okay buddy up here for this tutorial if you have difficulty in this tutorial, you can contact me or you can comment in comment column, and do not forget you to keep follow me because there will be more interesting tutorial again from this tutorial, and until meet again.
 The effect of this time is different from the previous effect, because you need the right material to make the effect, therefore you must have a galaxy image, you can download in Google or Google Image Downloader, after the material you have prepared can be instantly view. Tutorial. Below and you can also see the tutorial, before this in the home menu like Blue Eye Effect In Photoshop tutorial and much more.


